I have seen several makeovers of the Ikea Ung Drill frame. It only comes in black but thanks to the wonderful world of spray paint, there are sooo many ways to spruce them up!
Look how stinkin cute some of them are!

Source

Source

Source

And as a white board, Source
I needed one.
So, I bought said frame from Ikea.
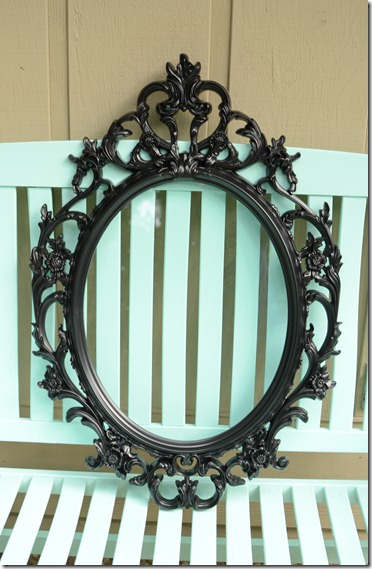
You can either buy it like this with a clear glass piece, or for $10 more purchase it with a mirror in the middle. I knew I’d be using mine as a chalkboard so I bought the clear one. Don’t worry, that $10 I saved has already been spent on something else.

I wasn’t sure about the color at first, but I am so happy with my choice. Krylon’s Blue Ocean Breeze in Gloss. And I picked up some chalkboard spray paint which I thought would be amazingly easy and fool proof. More on that later. Me and chalkboard spray paint are not on good terms right now.
Since the chalkboard paint needs several light coats and then has to “cure” for 24 hours before use, I started on it first. I removed the glass from the frame, wiped it down with some mineral spirits and sprayed away. It was super easy. Too easy to have an insto-chalkboard. I was super giddy. 
I probably did 5 or 6 light coats and set it aside to let it dry. For 24 painstaking hours.
Next up was the frame. I had several cheap cans of the $.96 white paint that I used as “primer”. I could have bought primer but honestly this paint isn’t good for much and I used up a few of my half empty cans to just give it a white base coat. Worked just fine.
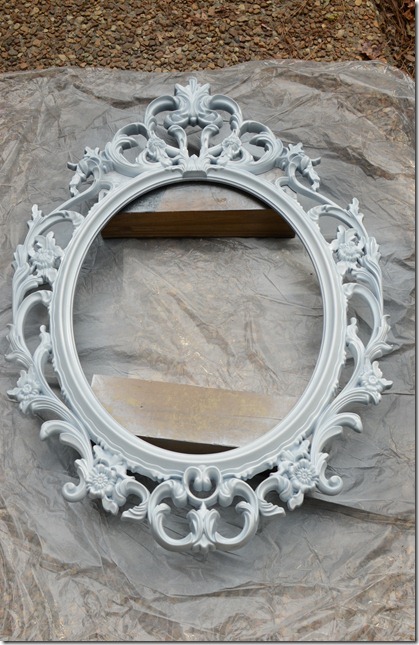
I was actually digging the whitish gray look and almost left it that way. But I knew I’d love the aqua when it was done so I moved along. I put probably 4 or 5 light coats of aqua on the frame letting it dry between each coat. I’m impatient so I only gave it a few minutes in between but since they were light coats they dried quickly anyway. BTW, those twirls and swirls everywhere were a beast to paint. I know I still didn’t get in every nook and cranny but it’s not noticeable.

Next up. Wait. Like until the next day.
And get frustrated with your camera remote because you can’t get it to focus on the subject while you take a picture pretending to “wait”.
Sheesh.

Fast forward 24 hours. Ready for the excitement of completing the chalkboard and hanging it on my wall.

First thing, you need to “prime” your chalkboard by rubbing the side of a piece of chalk all over and then wiping down. This helps for good erasing in the future.

Then write on your brand new chalkboard.
Then try again to write on your brand new chalkboard.
Then start to panic when you go to write on your brand new chalkboard and instead of the chalk writing the chalk is scratching the glass.
You might as well be writing on your chalkboard with a rock.
Then start to get really REALLY angry that your stupid chalkboard isn’t taking the chalk that you know works on chalkboard paint because you used it on another chalkboard!
Then take a picture of your stupid freaking chalkboard with scratches all over it because you don’t know what’s gonna happen after this and you need at least a good “after” picture for the blog.
Then take a minute to figure out the culprit.

Instead of taking out a hammer and smashing the whole entire project to smithereens, take a deep breath and decide you are going to give it another go around by painting it with chalkboard paint from a can. Spend another 24 hours waiting for it to cure. Prime it with chalk again and get really excited about putting it in the frame because this time, it’s gonna work. Then because you’re just unlucky by nature…
BREAK THE GLASS.

At this point, I actually cried. I laid down on the floor like a big girl, and sobbed. No lie.
Talk about extreme hatred for a project. If you have been reading this blog for at least the past few months, you’ll know that this is not the first time I have broken the chalk board glass after it was finally ready to be popped in the frame. Missed that post? Find it here. Oh, and hence the post of this title.
So, the next thing I did, was got desperate. I spray painted again the cut to size already cardboard backing that came with the frame. I don’t know now why I didn’t paint it with the paint from a can, but I didn’t. Actually I do know why. Because I already cleaned the paintbrush, which I hate doing. I was being impatient I guess and hoping the spray chalk board paint would work better since it was now on cardboard instead of glass. The result? Still, present time, it does not write on the freaking board with chalk. I guess my last resort is I’m going to have to take it back down and repaint it with the can paint.
Ugh.
But for now, I bought chalk board pens which write on it perfectly. However, it does not seem to wipe off easily. It just smears it.
Oh well. It’s up, it looks good, and I will just have to read “i will be grateful for this day” until I repaint it because I can’t wipe it off.


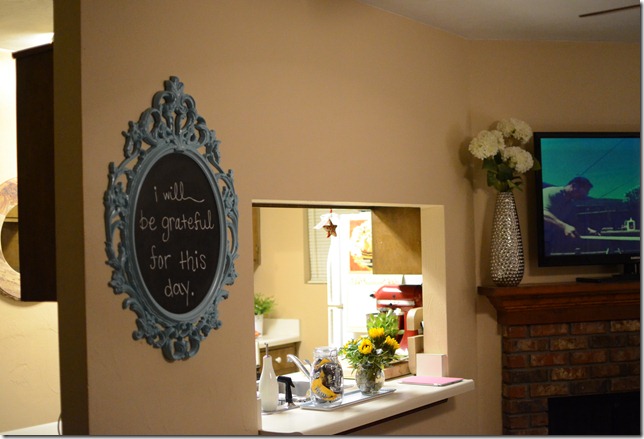
Oh the trials and tribulations of DIY.
And the beauty of this baby is I can repaint the frame color to match any future room it lives in.
Hooray for chameleon projects 
I WILL be grateful for this day even if everything does not go the way I plan it to.


