
I won’t go as far to say that my table got a full makeover, but she did get quite the facelift.

Still need to get around to doing something with my roadkill rescue chair…
If you recall in this post I said I had been meaning to get around to fixing her up.
This table was my dining room table before it was my craft table, and my in-law’s dining room table before it was my dining room table. Basically, she’s been around. If you know what I mean.

Her in the first rental on move in day. (I put the legs on backward when I put it together then haha)

My craft room in my last house.
Looking at these pics it’s hard to believe how much my taste/style has changed since then. But style does evolve and I’m sure a year from now I’ll be thinking the same thing about my current decorations.
I had been toying with the idea of painting her a really bold fun color after seeing these inspiration pictures.


(Still crushing on the all white…)

However, after seeing Katie Bower’s Table Makeover, I decided to keep it simple and classy (for now anyway).
Katie’s Masterpiece
I didn’t do a good job of taking before pictures of just the table, but there’s been enough before pictures of it so I didn’t think it was necessary. I’m sure you’ve seen one just like it at a garage sale or thrift store. Just begging for a makeover.
I basically followed all of Katie’s steps for the facelift so I’m not gonna do a tutorial. I’m really good at being lazy and not reinventing the wheel.

I sanded with my power sander! I used another one too for the first sanding and it was sooo loud. I was the only one making noise in my neighborhood. It had a high pitched squeal and sounded like a chainsaw at the same time. It was awesome. And Remi got covered in sanding dust. I mean seriously Rem. Who stands under a table while it’s being sanded? Hmm?
After sanding I wiped it down real good and opened the box to my compressor for the first time so I could blow off the dust with my high powered air sprayer.

Fail.
Seriously, who just has oil laying around for a compressor? Unless you’re my Dad?
Ugh.
Plan B, wipe, wipe, wipe some more with a clean cloth.
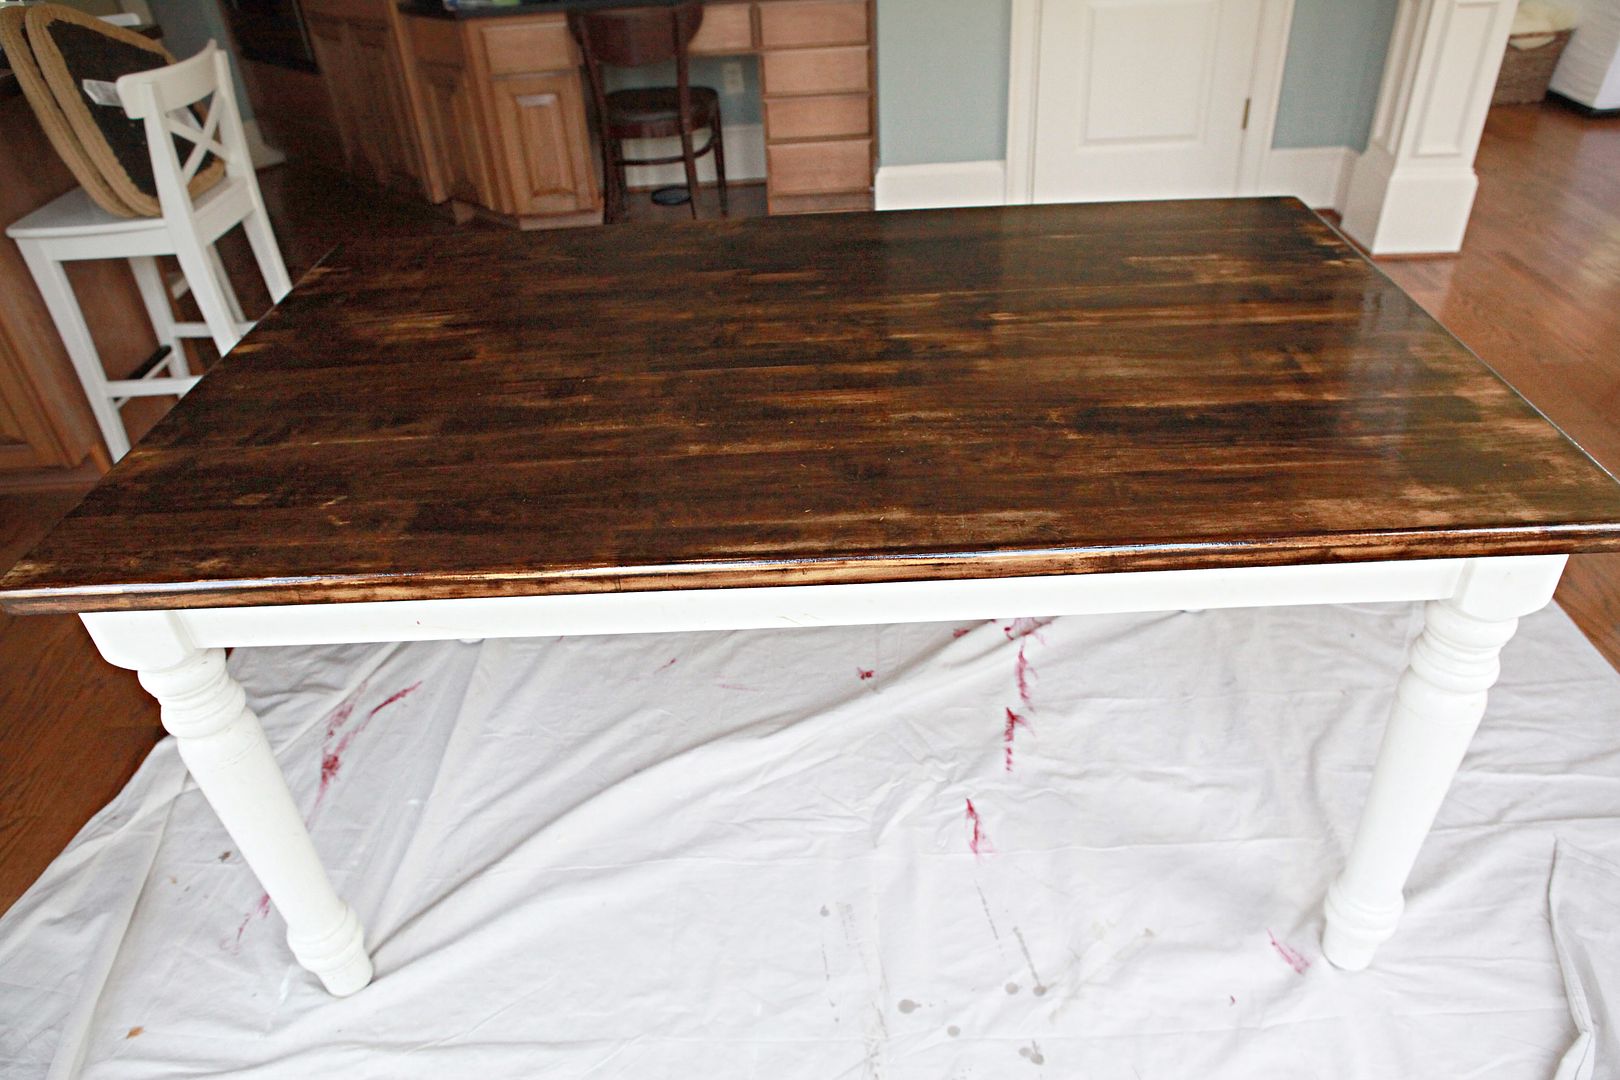
Then I got to staining.


Oh, like my makeshift lifters?
It went on Super Dark and I was really excited.
Until….

…I wiped it off.
Seriously? The stain did not take like I was hoping it would. I mean it was darker yes, but not dark like Katie B’s turned out. I’m guessing that means I didn’t sand well enough? Well I wasn’t about to drag it back outside and re-sand it.
So after waiting the 4 hours like the instructions said between coats, I put on the next coat and left it on even longer.
Only for it to come out looking the same.
Double ugh.
I let the stain dry real good all the next day then put on the first coat of oil-based Polyurethane. (Which did a little magic and made it seem darker)
That stuff stinks. I wouldn’t recommend doing it inside. And the only reason I did is because the table is super heavy for one person and it was already hard enough to get it in and out to sand it, and once I poly’d it I wouldn’t be able to turn it on it’s side to bring it back in, so inside painting it was.
After it dried, 24 hours later, I sanded it with In-Between-Coats sandpaper. Then I put the second and last coat of poly on and let it dry another 24 hours. I am so impatient and it was so hard to wait for all this proper drying time, but this table gets a lot of use and I wanted to make sure it holds up in the future.
During times when I was waiting on drying I also painted the legs with two new coats of fresh white.

“Lieutenant Dan, you got new legs!”
Name that movie.
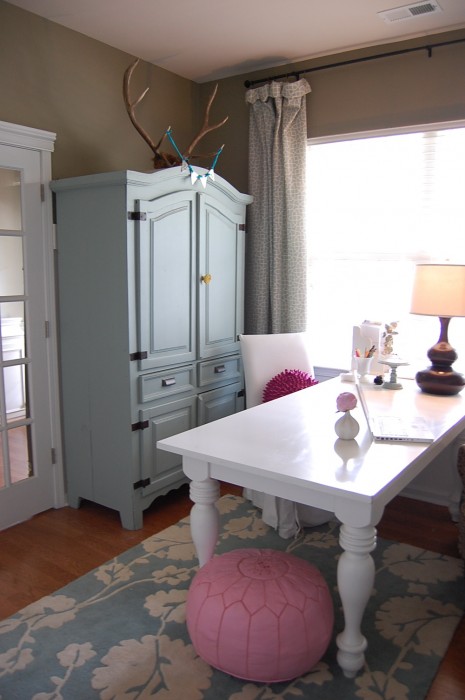
After 4 days of patiently waiting for everything to be done and living with my most used room in disarray, it’s all done.

Again, it’s not nearly as dark as I wanted, but I think it has a cool rustic look about it that’s perfectly imperfect. And it looks a lot cleaner and more polished than before.

Ugh, I hate pesky cords. Seeing this pic makes me need to wrangle those things up.


Always Mr. Happy
And because everyone loves a before and after side-by-side.
![TLG_7487_thumb[3] copy](https://blogger.googleusercontent.com/img/b/R29vZ2xl/AVvXsEhgz76Pi8cxBUdeFnmcfS4HgfAzvOG0UzAu6AlGvnWzRZ_MY4J9w5jH0eE-HUk0NfxbNISqakzr9e3guzUCU0wGrYbHHk_-5ru9Ef4ld8VMfyPjw8arl5nAEfVQuXT6BnULkerCfkLrfSs/s1600-h/TLG_7487_thumb%25255B3%25255D%252520copy%25255B5%25255D.jpg "TLG_7487_thumb[3] copy")

What do you think? An improvement? I’m definitely loving it!
I LOVE, LOVE, LOVE everything about it!! It would've been a tough choice for me too as far as wanting to paint it a bold color. I LOVE that turquoise. But the white is so classic and you can always accent with pops of color! And I freaking love that quote you have on your chalkboard. So cute. I love the space! xoxo
ReplyDeleteHey there! I just stumbled across your blog, and I think the table looks great! Totally rustic, in a fresh way. I appreciate that you described the ugh moments...stuff like that always happens to me. I have that same table, so I'm excited and inspired to change it up. Thanks! -Dawn
ReplyDeleteThank you so much Dawn! I'd love to see your table once it's done :-) and yes...it's definitely not always "as planned" in the wonderful world of DIY!
Delete